Skip to content


The safest way to pack antiques is museum-style layering: a breathable, finish-safe contact layer first, then cushioning, then structural protection, with clear documentation at every stage. For pieces appraised above a moderate value threshold, or anything with original shellac, fragile veneer, or awkward dimensions, professional packing and custom crating are worth the added cost.
Quick packing checklist:
- Photograph each piece from six angles before touching it; store images in cloud backup
- Record maker, provenance, and any existing damage in a written inventory
- Apply a finish-safe contact layer first: 100% cotton sheet, acid-free tissue, or glassine
- Add closed-cell foam cushioning, then a moving pad or corrugated shell
- Double-box small fragile items or crate high-value pieces
- Label every carton with room destination, orientation, and fragility
- Choose climate-controlled transport for wood, veneer, textiles, or paintings on long hauls
When to hire professionals: call a specialist packer when a piece has an original finish, carries a high appraised value, weighs more than two people can safely lift, or needs a custom crate. The Canadian Conservation Institute recommends consulting a conservator before packing any object with unstable or flaking surfaces. Aleksmoving’s specialist antiques team handles exactly these situations across Ontario and Canada.
Pro Tip: Never assume a piece is stable because it looks intact. Hidden repairs, loose veneer, and old glue joints can fail under the vibration of even a short drive.
Table of Contents
- What materials do you need to pack antiques in Canada?
- How to pack antiques safely, step by step
- Item-by-item techniques for common antiques
- How do you load and transport antiques without damage?
- Professional packing vs. DIY: which is right for your antiques?
- What does it cost, and how long does packing take?
- How Aleksmoving handles antiques: a real-world example
- Common packing mistakes and how to fix them fast
- Key takeaways
- Why antiques need a different approach than regular furniture
- Aleksmoving’s antiques service: get a quote for your move
What materials do you need to pack antiques in Canada?
Getting the right supplies before you start is half the battle. The wrong wrap on a shellac finish can leave ghost lines that no amount of polishing will remove.
Finish-safe contact layers
The first material to touch your antique must be breathable and non-reactive. Use 100% cotton sheets, acid-free tissue paper, or glassine. Never apply plastic shrink wrap or bubble wrap directly against original shellac, lacquer, or oil finishes; plastic can adhere to or off-gas onto the surface, causing permanent damage. Reserve shrink wrap for the outermost layer only, once the piece is fully wrapped in breathable material.
Cushioning and structural protection
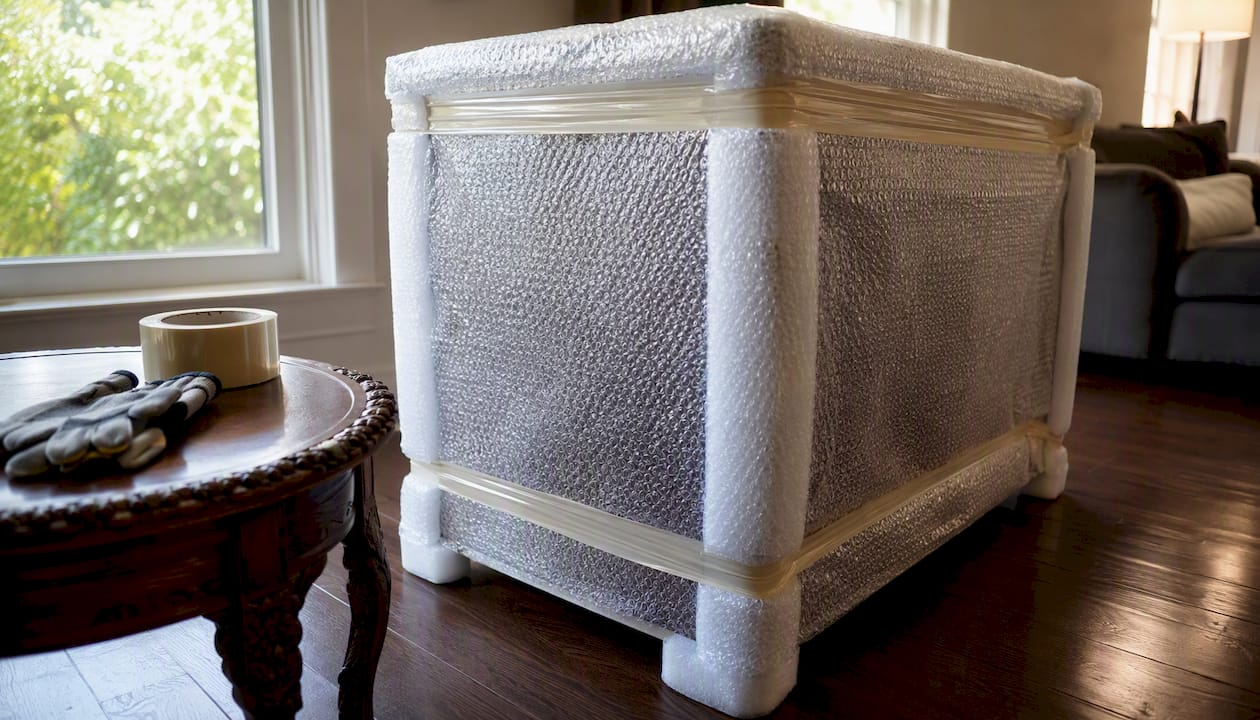
Closed-cell polyethylene foams, such as Ethafoam-style sheets, are the museum and conservator standard for interior cushioning. They absorb shock without off-gassing and do not compress permanently. Bubble wrap works well as a secondary outer layer, bubbles facing inward. For structural shells, use double-walled corrugated boxes, mirror cartons for framed pieces, and wooden crates for anything high-value or structurally delicate.
| Material | Why it matters | Canadian availability |
|---|---|---|
| 100% cotton sheets / glassine | Finish-safe first contact; breathable and non-reactive | Hardware stores, art supply shops, moving suppliers |
| Acid-free tissue paper | Prevents acid transfer to paper, gilding, and painted surfaces | Art supply stores, online (Staples, Amazon.ca) |
| Closed-cell polyethylene foam (Ethafoam-style) | Superior shock absorption; museum standard | Packaging suppliers, moving companies |
| Bubble wrap | Secondary outer cushioning; bubbles inward only | Hardware stores, moving suppliers |
| Double-walled corrugated boxes | Structural shell for small-to-medium fragile items | Moving supply stores, UPS/FedEx locations |
| Mirror/picture cartons | Sized for framed art and mirrors | Moving supply stores |
| Padded moving blankets (breathable) | Furniture wrap; protects large surfaces | Moving companies (rent or buy) |
| Wooden crates with foam cradles | Maximum protection for high-value or structurally fragile pieces | Custom crating companies, specialty movers |
| Acid-free packing tape / cotton tape | Seals without damaging surfaces | Art supply stores, hardware stores |
| Numbered zip-lock bags | Hardware organisation during disassembly | Dollar stores, hardware stores |
Pro Tip: Bring a digital camera or use your phone to photograph each piece before, during, and after packing. Those images are your strongest evidence if a claim ever needs to be filed.
How to pack antiques safely, step by step
Follow this sequence for each piece. Rushing any stage is where damage happens.
- Photograph and document. Shoot each antique from six angles: front, back, both sides, top, and any ornate detail. Record the maker, provenance, and every existing scratch, crack, or repair in a written inventory. Note the appraised value and confirm your insurance coverage before packing begins.
- Disassemble carefully where designed to do so. Remove drawers, shelves, and loose hardware only where the piece was built to allow it. Never force pegged or glued joints. Place every screw and fitting into a numbered zip-lock bag, photograph the joint before separating it, and tape the bag to the corresponding piece.
- Apply the finish-safe contact layer. Lay a 100% cotton sheet or glassine directly against the surface. Follow with acid-free tissue, then a padded moving blanket or foam sheet. The professional layering sequence is: cotton sheet, unprinted newsprint, moving pad, corrugated protection, then crate or outer shrink-wrap. Plastic wrap goes on last, never first.
- Add cushioning and inner support. For small fragile items, place the wrapped piece in a snug inner box with a generous amount of closed-cell foam on all sides, then place that box inside a larger outer box filled with ample void fill. This double-boxing method distributes impact forces and is the gold standard when crating is not used. For odd-shaped objects, a suspension or cradle system that isolates the item from the box walls works even better.
- Label and document the packed carton. Place a packing list inside the outer box before sealing. Mark the outside with the destination room, “FRAGILE,” and an orientation arrow. Back up all photos to cloud storage so they are accessible from any device at delivery.
- Plan the load. Mark antiques and fragile cartons to be loaded last and unloaded first. Note any climate-control requirements on the carton itself and in your inventory form.
Pro Tip: Allow 15–30 minutes per small fragile piece and 45–90 minutes per large furniture item when planning your packing day. Rushed packing is the single most common cause of avoidable damage.
Item-by-item techniques for common antiques
China, glass, and porcelain
Wrap each piece individually in acid-free tissue, then a layer of bubble wrap. Pack plates vertically, not flat; vertical orientation distributes pressure across the rim rather than the face. Use cardboard divider inserts for stemware and glasses. Double-box the entire set, with the inner box snugly cushioned and the outer box filled with void fill on all sides.
- Wrap each piece individually before nesting
- Plates stand on edge, never flat
- Stemware gets individual cells or dividers
- Double-box the finished inner carton
Framed art and mirrors
Apply glassine or acid-free tissue directly to the glazed surface, then foam corner protectors on all four corners. Use a purpose-built mirror carton or picture carton sized as close to the frame as possible. For paintings on canvas or panel, travel on edge, never flat. High-value works benefit from a custom crate with an interior foam cradle. See Aleksmoving’s detailed guide on packing paintings for a move for canvas-specific steps.
Clocks and mechanical items
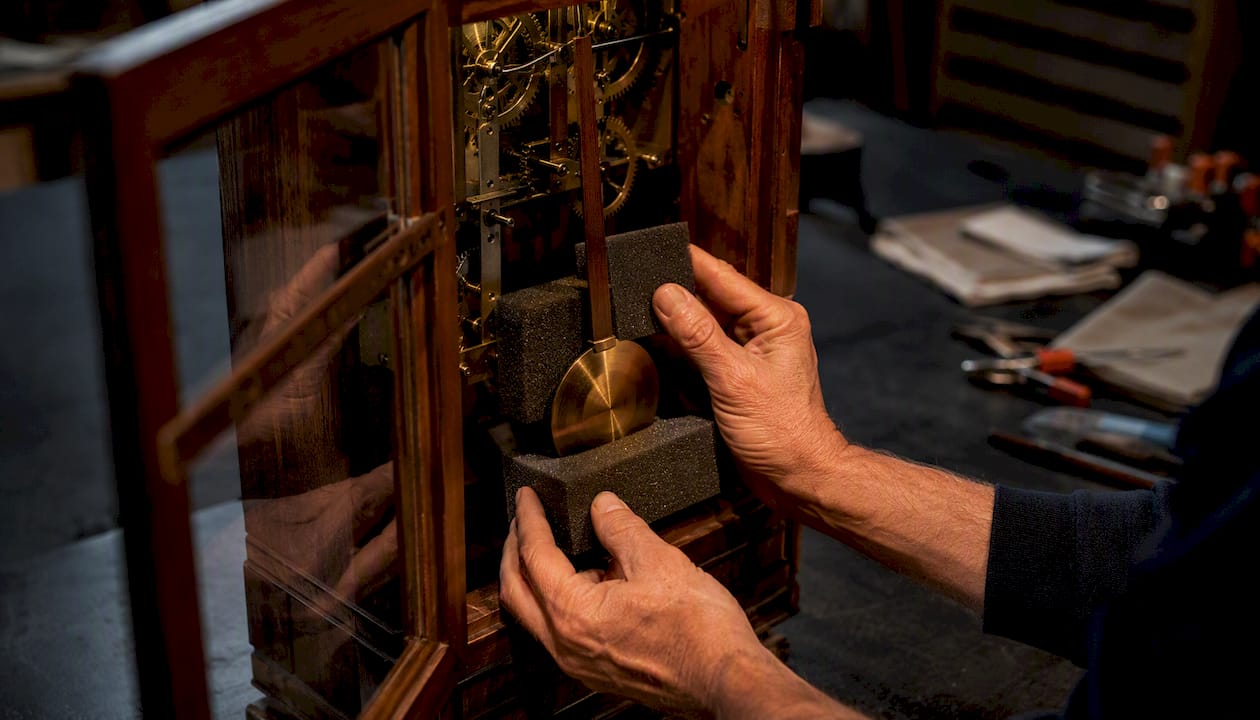
Secure the pendulum with foam or a cloth pad so it cannot swing during transit. Remove weights and batteries. Photograph the mechanism and note the original position of any adjustable parts. For very old or complex movements, a horological conservator’s advice before packing is worth the consultation fee.
Antique furniture
| Step | Action |
|---|---|
| Disassemble | Remove drawers, doors, and shelves; bag and tag all hardware |
| Photograph | Shoot joints and connections before separating |
| Protect finish | Cotton sheet directly on surface, then moving pad |
| Reinforce corners | Corrugated cardboard corner guards on all exposed edges |
| Wrap | Padded moving blanket over the full piece |
| Crate or blanket-wrap | Crate for very tall, fragile, or high-value pieces |
Lamps and lighting
Remove shades and wrap them separately in acid-free tissue and bubble wrap. Box bases upright with internal foam bracing so the base cannot tip or shift. Never pack a shade and base together; the shade will crush.
Textiles and rugs
Roll, never fold. Folding creates permanent crease lines and can crack fibres in aged textiles. Roll around an acid-free tube if available, then wrap in breathable cotton or acid-free tissue. Label the roll with orientation and provenance notes.
How do you load and transport antiques without damage?
Loading order matters as much as packing. Antiques and framed pieces go in last and come out first, so they spend the least time in the van and are never buried under other cargo.
Keep paintings and framed work standing on edge, secured against a padded wall. Place heavy, stable items on the floor; lighter fragile cartons go on top, never underneath anything that could shift. Keep all antique cartons away from the truck walls, where temperature swings are most extreme during Canadian winters and summers.
Climate-controlled transport is strongly recommended for wood, veneered furniture, paintings on canvas or panel, and paper or textile-based antiques on moves longer than a few hours. Rapid humidity and temperature swings can warp veneers, cause finish cracking, and shrink canvas. Climate-controlled service is typically available for a modest surcharge and is worth requesting for any piece you would not want to replace.
Use padded straps and blocking to prevent lateral movement. Very heavy crates should be palletised to prevent sliding on hard stops. For long-haul moves across Ontario or interprovincially, document the handoff with photographs at both pickup and delivery, and inspect every piece before signing the delivery receipt.
Professional packing vs. DIY: which is right for your antiques?
The honest answer depends on four things: appraised value, finish sensitivity, size and weight, and your tolerance for risk.
DIY packing is reasonable for lower-value or robust pieces when you follow museum-grade layering and double-boxing. The cost savings are real, and you have full control over the process. Where DIY falls short is on pieces with original finishes, complex mechanisms, or structural fragility, where a single misstep can cause irreversible damage.
Professional packing brings museum-grade materials, custom crating, trained handlers, and written condition inventories. Better documentation also produces better claims outcomes when something does go wrong. For items appraised above roughly $2,000–$5,000, and especially above $10,000, custom wooden crates with foam cradles are strongly recommended. If an object has an unstable or flaking surface, a conservator should be consulted before any packing begins.
| Criteria | DIY packing | Professional packing |
|---|---|---|
| Cost | Lower upfront; materials only | Higher; includes labour, materials, crating |
| Finish protection | Depends on technique | Museum-grade layering, conservator-grade materials |
| Documentation | Self-managed | Written condition inventory, signed at handoff |
| Custom crating | Rarely feasible | Available for high-value or fragile pieces |
| Claims support | Weaker without professional documentation | Stronger; condition reports support claims |
| Best for | Robust, lower-value items; confident DIYers | Original finishes, high appraised value, complex pieces |
What to ask a professional mover:
- Written condition inventory before and after the move
- Crate specifications and foam cradle details for high-value items
- Insurance options: declared value, mover liability, and third-party coverage
- Crew experience specifically with antiques and fine art
What does it cost, and how long does packing take?
Costs vary by piece complexity, distance, and whether custom crating is needed. These are realistic Canadian ranges to use for budgeting.
| Item type | Typical Canadian cost range | Estimated packing time |
|---|---|---|
| Small fragile item (china, figurine) | $15 per piece (professional packing add-on) | 15–30 minutes |
| Framed art / mirror (standard) | — | 15–30 minutes |
| Antique furniture (medium) | — | 45–90 minutes |
| Custom wooden crate (small) | — | 1–3 days lead time |
| Climate-controlled transport surcharge | Typically 5–10% above standard rate | N/A |
| Professional appraisal (for insurance) | — | Half-day to full day |
Major cost drivers are custom crating, distance, climate-controlled transport, appraisal fees for declared-value insurance, and labour hours for careful packing. Regional variation across Canada is real: expect higher rates in the Greater Toronto Area and Vancouver than in smaller centres. Build lead time for custom crates into your moving schedule; a last-minute crate order is rarely possible.
How Aleksmoving handles antiques: a real-world example
Aleksmoving’s antiques process starts before a single box is opened. A specialist team conducts an on-site survey, reviewing each piece for finish type, structural condition, and any existing damage. Every item is photographed and entered into a condition inventory that the client reviews and signs before packing begins.
From there, the team selects materials based on the specific piece: glassine and cotton for shellac finishes, closed-cell foam cradles for mechanically complex items, and custom crates for anything above the threshold where blanket-wrapping alone is insufficient. The loading plan is set in advance so antiques are always the last items loaded and the first off the truck.
Clients receive a flat-rate quote with no hidden fees before any work begins. Insurance options, including declared value and third-party coverage, are discussed at the survey stage so there are no surprises at delivery.
What to expect on packing day with Aleksmoving:
- Crew briefing on each piece’s condition and handling requirements
- Condition documentation completed and signed before packing starts
- Materials selected per piece: cotton, glassine, foam, corrugated, or custom crate
- Insurance and declared-value options confirmed in writing
- Loading plan reviewed so fragile items are protected throughout transit
For long-distance antiques moves, Aleksmoving’s guide to packing antiques for a long-distance move covers crating specifications and climate-control decisions in detail.
Common packing mistakes and how to fix them fast
Most antique damage during a move is preventable. These are the errors that come up repeatedly.
Mistakes to avoid:
- Applying shrink wrap or bubble wrap directly against shellac, lacquer, or painted finishes
- Overstuffing boxes so the lid bows or the contents are under pressure
- Leaving drawers full of contents, which adds weight and shifts during transit
- Failing to bag and secure loose hardware before moving furniture
- Skipping condition documentation, which makes insurance claims nearly impossible to support
- Packing a piece with an unstable or flaking surface without conservator guidance
Red flags at pickup or delivery:
- Packaging that has been altered, re-taped, or is visibly crushed
- No written condition notes or inventory from the mover
- Visible condensation or temperature extremes inside the transport vehicle
Quick fixes if something goes wrong:
- Photograph the damage immediately, before moving the piece or removing any packaging
- Retain all original packaging; carriers often require it for inspection
- File a claim with the carrier and your insurer as soon as possible, with photos and the original condition inventory
- Request an inspection while the crew is still present; do not sign the delivery receipt until you have checked every piece
Troubleshooting common problems:
- Imprint on finish from bubble wrap: do not rub; consult a conservator for appropriate treatment
- Loose veneer discovered at delivery: keep the piece flat, photograph, and contact a furniture conservator before attempting any repair
- Cracked glass in a frame: retain all fragments, photograph in place, and document for the insurance claim before removing glass
Key takeaways
Museum-style layering, thorough documentation, and the right structural protection are the three non-negotiable elements of safely packing antiques for any Canadian move.
| Point | Details |
|---|---|
| Document before you pack | Photograph every piece from six angles and record provenance, condition, and appraised value before touching it. |
| Finish-safe layering is non-negotiable | Always apply a breathable contact layer (cotton, glassine, or acid-free tissue) before any foam or plastic wrap. |
| Double-box or crate fragile and high-value items | Items appraised above $2,000–$5,000, and especially above $10,000, warrant custom crating; all small fragile pieces need double-boxing as a minimum. |
| Climate control protects wood and textiles | Request climate-controlled transport for veneered furniture, paintings, and textiles on moves longer than a few hours. |
| Aleksmoving for professional antiques moves | Aleksmoving provides on-site surveys, condition inventories, museum-style packing, and flat-rate pricing across Ontario and Canada. |
Why antiques need a different approach than regular furniture
Most people underestimate how much a historical finish changes the risk profile of a move. Modern furniture is built to be wiped down, stacked, and shipped in standard corrugated. Antiques are not. A piece with original shellac from the 1880s has a finish that is both irreplaceable and genuinely fragile in ways that are not obvious until something goes wrong.
What surprises even careful movers is how often hidden repairs reveal themselves under transit stress. A veneer patch that held for decades can separate after thirty minutes on a highway. A glue joint that looked solid can open under the vibration of a truck. These are not failures of the piece; they are failures of packing that did not account for the piece’s actual condition.
The museum-packing principle is worth taking seriously: control the microclimate around the object, prevent any surface contact with reactive materials, and never assume stability. Inspecting a piece carefully before packing, rather than assuming it is fine because it looks fine, is the single habit that separates a good outcome from a costly one. For anything with original finishes or a meaningful appraised value, that inspection should happen before a single sheet of wrap is unrolled.
Aleksmoving’s antiques service: get a quote for your move
Packing antiques properly takes time, the right materials, and a clear process. Aleksmoving’s antiques and art moving service covers every stage: on-site condition survey, written inventory, museum-style packing with finish-safe materials, custom crating where needed, and climate-controlled transport options for sensitive pieces across Ontario and Canada.
Flat-rate pricing means you know the full cost before the crew arrives, with no surprises at delivery. Insurance and declared-value options are discussed at the survey stage so your pieces are protected from the moment packing begins. To get started, have your photos, approximate dimensions, and any appraisal documents ready, then request a free moving quote through the Aleksmoving website. A specialist will follow up to confirm the details and schedule your on-site survey.